第四章:用户和角色还有权限的管理
配置ipa服务器
这里我们将ipa和存储都放在一台服务器上,是api服务器也是存储服务器,环境有需要的时候,放两台服务器也可以。
ipa服务器我们同样也是关闭了selinux和firewalld, 这里我们不考虑这些配置,直接关闭。
系统使用的是rhel7.3
安装软件
Identity Authentication
api-server是我们的目录服务,i代表的是Identity,验证,p是Policy,策略,a就是Audit,审计 这里我们要安装dns服务bind的一些软件,和ipa-server
[root@ipa ~]# yum install bind bind-dyndb-ldap bind-libs bind-utils ipa-server ipa-server-dns -y
ipa-server的安装
现在我们先安装dns, 如果提示是否要覆盖bind配置,就填写yes,确认覆盖
这里要注意,我们要配置的域,不要与已存在的域冲突,不要与/etc/resolv.conf里配置的信息冲突。 密码我们都设置成了redhat123
- Existing BIND configuration detected, overwrite? [no]: yes
- Do you want to configure DNS forwarders? [yes]: no
- Continue to configure the system with these values? [no]: yes
[root@ipa ~]# ipa-server-install --setup-dns
...
...
Restarting the web server
==============================================================================
Setup complete

Next steps:
    1. You must make sure these network ports are open:
        TCP Ports:
          * 80, 443: HTTP/HTTPS
          * 389, 636: LDAP/LDAPS
          * 88, 464: kerberos
          * 53: bind
        UDP Ports:
          * 88, 464: kerberos
          * 53: bind
          * 123: ntp

    2. You can now obtain a kerberos ticket using the command: 'kinit admin'
       This ticket will allow you to use the IPA tools (e.g., ipa user-add)
       and the web user interface.

Be sure to back up the CA certificate stored in /root/cacert.p12
This file is required to create replicas. The password for this
file is the Directory Manager password
然后要重新获取下管理员的密码,这里我们的密码之前设置的是redhat123
[root@ipa ~]# kinit admin
Password for admin@ALV.PUB:
Note
因为环境里涉及到了kerberos,住寂寞就是主机名,IP就是IP,不可以通用的,长主机名不可和短主机名混用。
登录、使用ipa
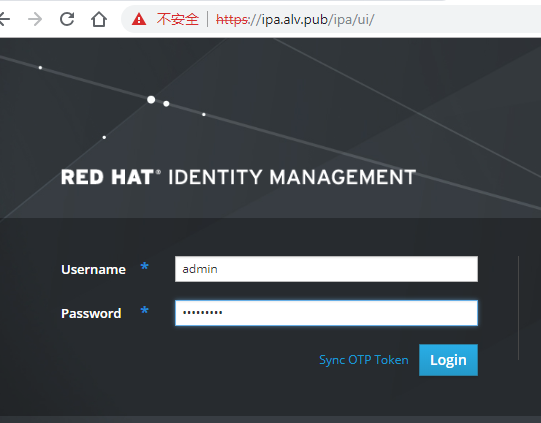
客户端做好域名解析之后,通过域名https://ipa.alv.pub访问ipa ,
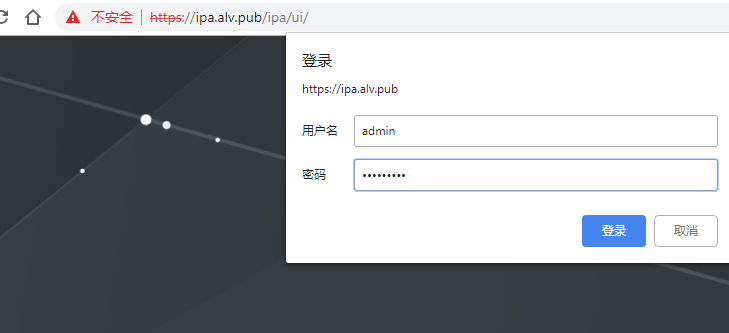
用户名是admin,密码是我们前面设置的redhat123
然后user界面可以去添加用户,网络服务里可以去配置dns。
我们可以把我们的RHEVM添加到这里面来,添加进来之后,我们在这里创建的一系列用户名,就都可以再RHEVM里设置了。
添加dns解析
- 现在我们点击 service, dns, 来添加一条dns解析
先点击alv.pub. 表示我们是要在这个域里添加解析, 然后点add,然后填写解析信息
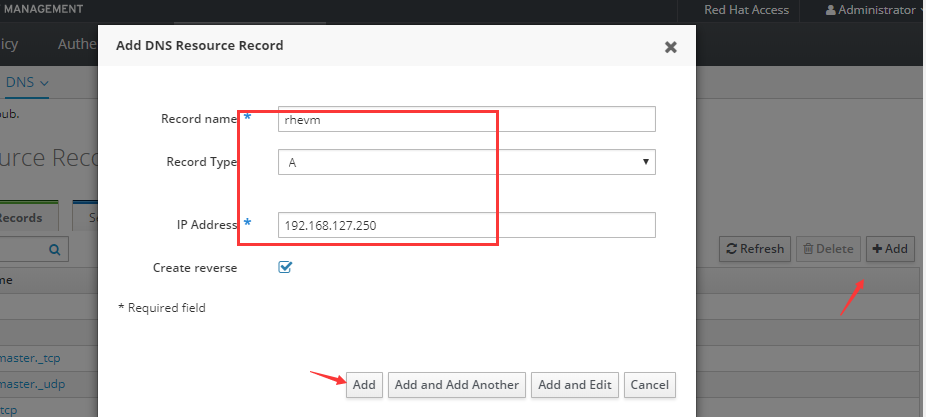
这样,我们就成功添加了

然后我们以同样的方式添加其他几台主机,rhvh1 rhvh2
添加用户
这里我们添加一个用户tom
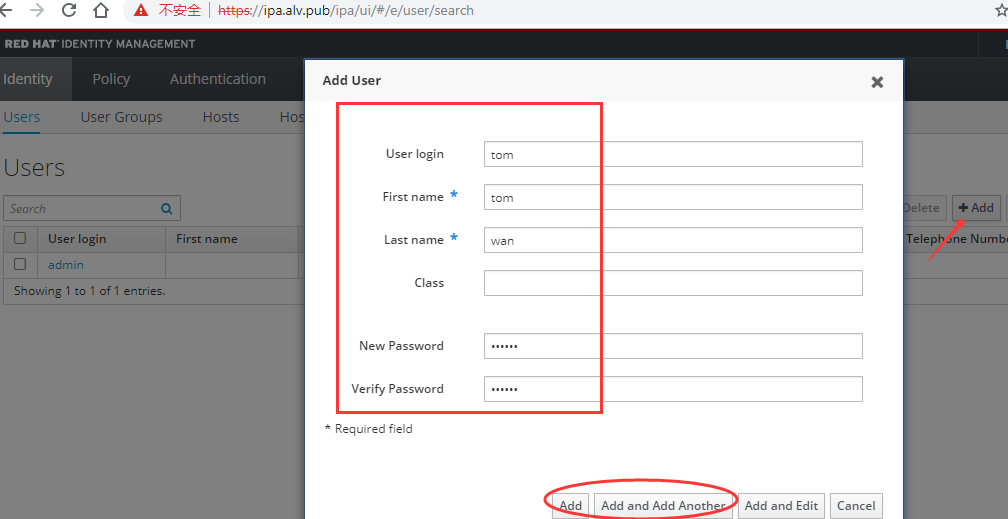
然后用同样的方式添加一个bob
然后我们添加一个管理员账号,名为rhvmadmin 用于给普通用户授权,还是像刚才那样创建。
创建好rhvmadmin用户之后,它现在还不是admin,我们需要去给它权限,所以我们点击User Groups
然后,我们把rhvmadmin用户添加到trust admins组里面去, 我们先点击trust admins,然后点击add ,然后选择rhvmadmin用户,点击那个向右的箭头,然后点击add
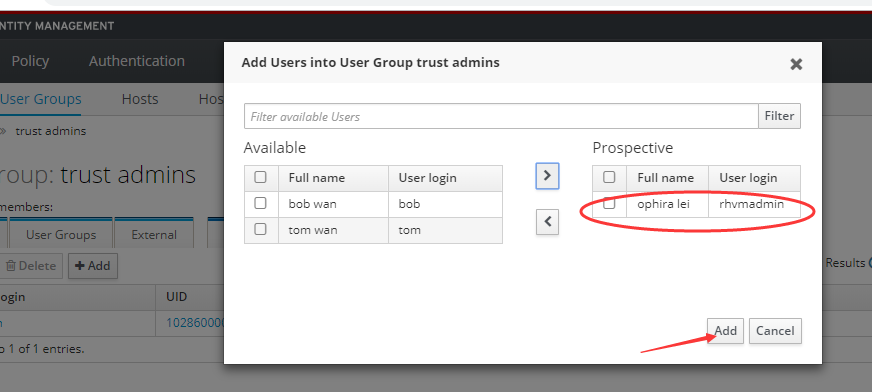
现在,我们的admins组里就有了两个用户,之前的admin,和刚添加的rhvmadmin
初始化密码
然后我们去给刚才创建的用户初始化密码, 刚才我们将密码设置为了redhat,现在我们这里先输入旧密码redhat,然后设置新的密码,这里我们设置为了redhat123.
[root@ipa ~]# kinit tom
Password for tom@ALV.PUB:
Password expired.  You must change it now.
Enter new password:
Enter it again:
[root@ipa ~]# kinit bob
Password for bob@ALV.PUB:
Password expired.  You must change it now.
Enter new password:
Enter it again:
[root@ipa ~]# kinit rhvmadmin
Password for rhvmadmin@ALV.PUB:
Password expired.  You must change it now.
Enter new password:
Enter it again:
加入域
先确认时间是同步的
然后在rhevm上安装软件包
[root@rhevm ~]# yum list *aaa*setup*|tail -1
ovirt-engine-extension-aaa-ldap-setup.noarch          1.3.2-1.el7ev           r3
[root@rhevm ~]# yum install ovirt-engine-extension-aaa-ldap-setup -y
装好之后我们执行下面的命令,进行加入到域,执行下面的命令后选择6,我们用IPA
[root@rhevm ~]# ovirt-engine-extension-aaa-ldap-setup
...
Please select: 6
Please select: 1
Please enter host address: ipa.alv.pub
...ficate (File, URL, Inline, System, Insecure): URL
URL: https://ipa.alv.pub/ipa/config/ca.crt
Enter search user DN (for example uid=username,dc=example,dc=com or leave empty for anonymous): uid=rhvmadmin,cn=users,cn=accounts,dc=alv,dc=pub
Please specify profile name that will be visible to users [ipa.alv.pub]: alv.pub
Select test sequence to execute (Done, Abort, Login, Search) [Abort]: Login
Enter user name: rhvmadmin
Enter user password:
Select test sequence to execute (Done, Abort, Login, Search) [Abort]: Done
Note
查看ipa用户,可以使用ipa命令,比如查看rhvmadmin用户的信息
ipa user-show rhvmadmin --all
然后我们重启一下服务
[root@rhevm ~]# systemctl restart ovirt-engine
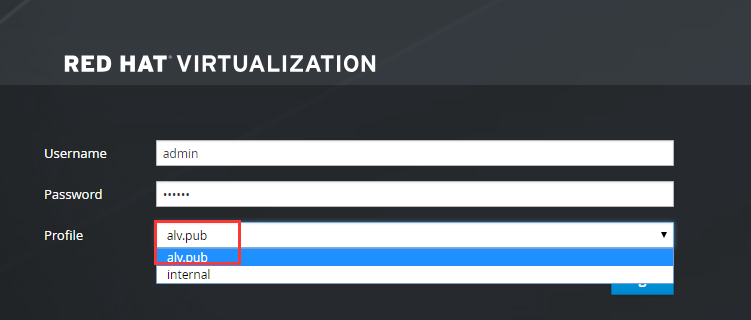
然后骑web界面退出后重新登录rhevm, 这个时候我们可以看到域那里已经有我们创建的alv.pub了。 这里只是截图演示一下存在,当我们现在还不使用alv.pub,依然选择internal的admin去登录。
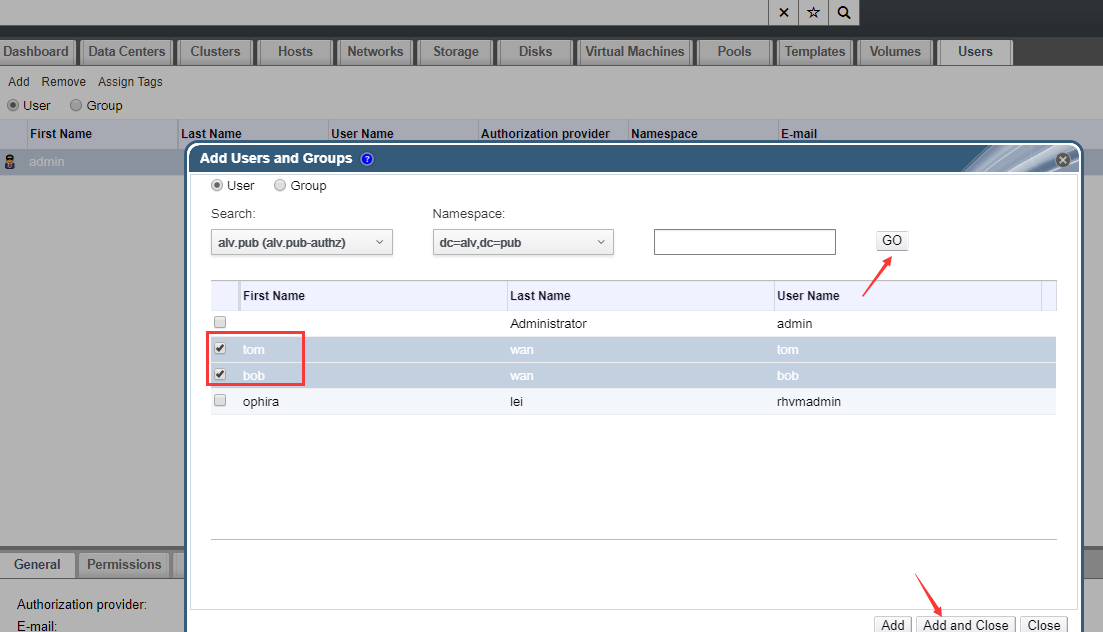
然后我们点击用户,去添加,这里我们选择alv.pub域,然后点击右边的go,就可以搜索域内的用户了,然后我们选择bob和tom用户,去添加他们。
配置用户权限
这里我们点击右上角的配置
- 然后这里有角色管理, 角色:就是权限的集合体.
- 比如:
- role1 —> 开启虚拟机
- 关闭虚拟机 模板管理
- role2 —>
- 开机虚拟机 关闭虚拟机
然后我们把role1 交给tom,那么tom就拥有role1的权限。
创建角色
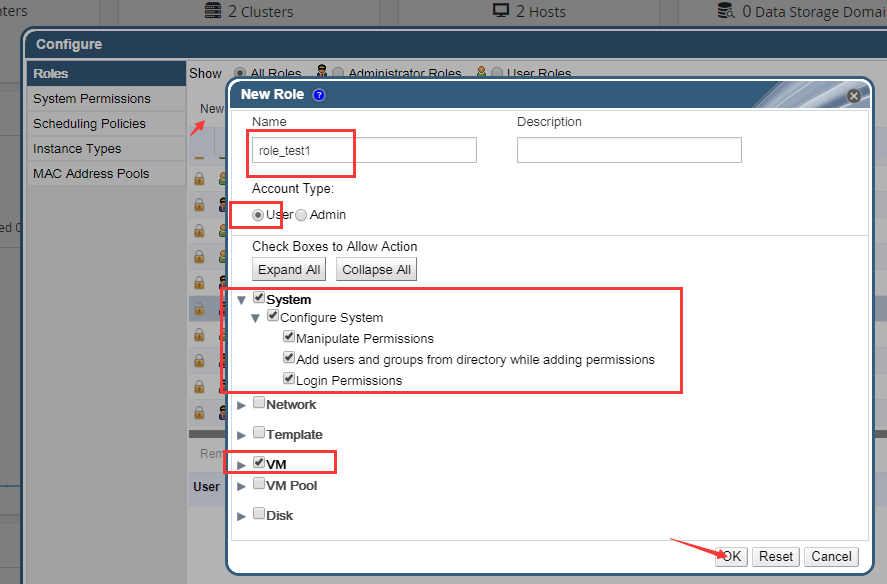
下面我们来创建一个角色。
这里账号类型上我们可以选择用户角色或管理员角色,选择管理员角色会有跟多的选项,也就更多的权限选择。
这里我们直接选择用户,给予他如下的权限。
然后我们点击系统权限,给tom授权, 然后可以看到tom就拥有了role_test1的权限了。
Note
想要在rhevm里添加用户,直接添加是不行的,我们需要先在域里面添加用户。
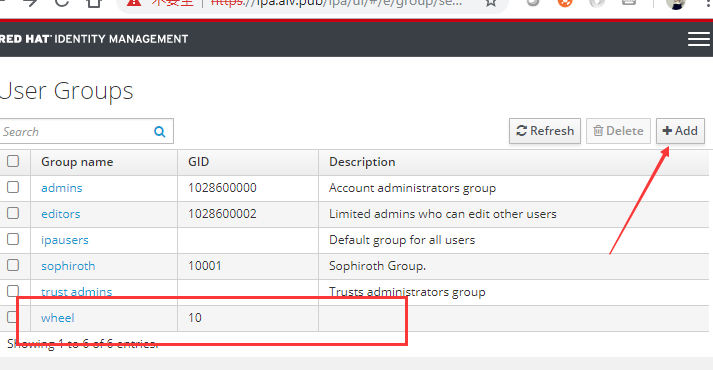
额外内容:添加ldap组
点击user groups, 然后点击add,添加组名和组id信息, 这里我们添加了一个名为wheel的组,组id设置为10,这个组是有特殊用途的,用于给予sudo权限,因为系统默认的配置里,给予wheel组sudo的权限。
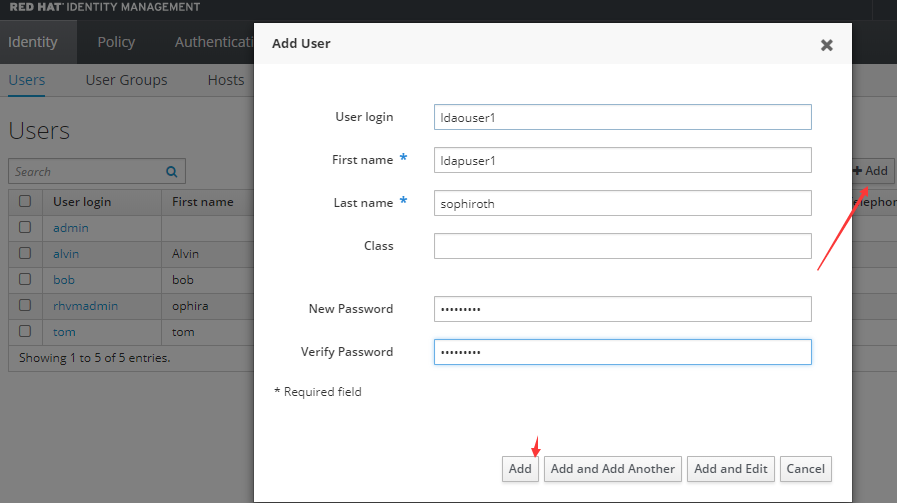
额外内容:添加ldap用户
这里我们添加一个ldap用户,名为ldaouser1
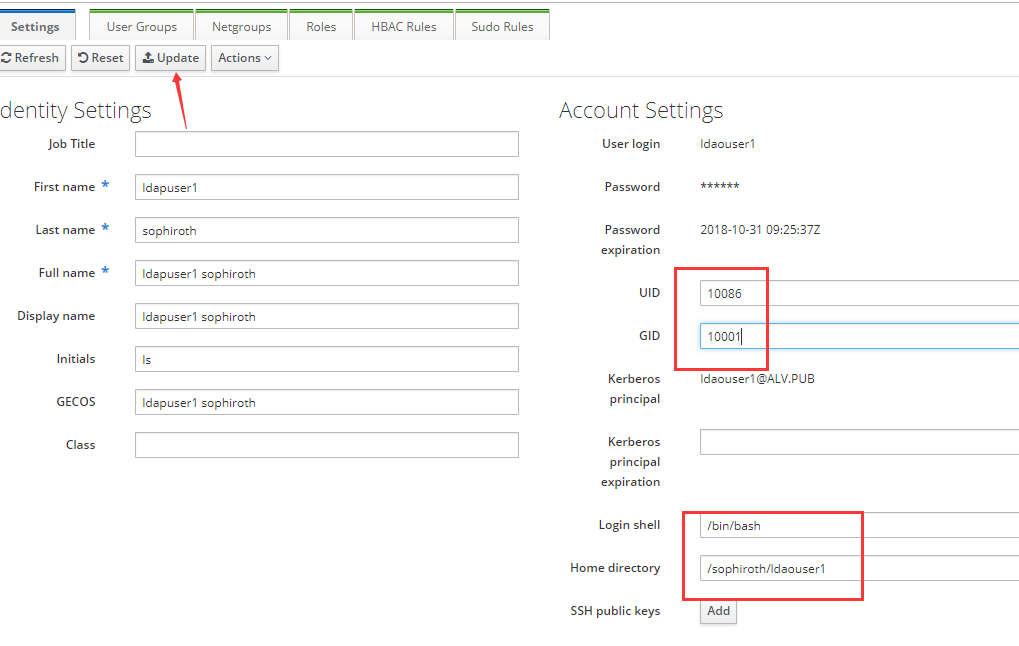
然后点击这个用户,去修改他的信息
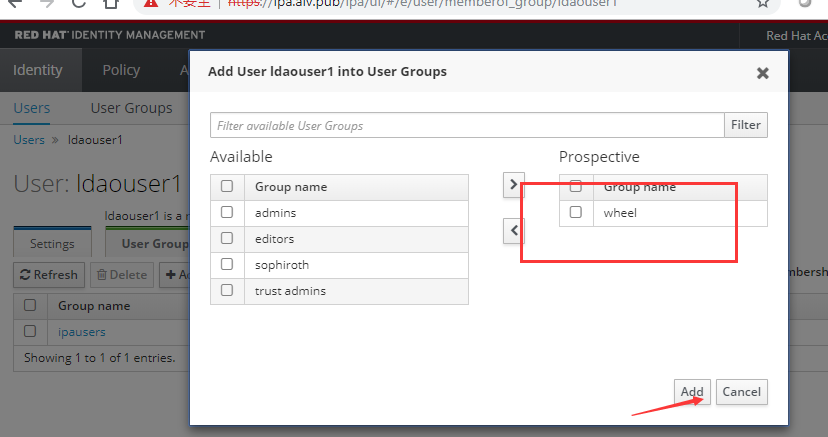
然后点击User Groups 去为用户添加组,这里我们将wheel添加给ldaouser1
然后我们去一台nfs服务器上共享目录,将一个目录共享出来给ldaouser1作为home目录。
[root@dc ~]# mkdir -p /ldapUserData/ldaouser1/
[root@dc ~]# chown 10086 /ldapUserData/ldaouser1
[root@dc ~]# vim /etc/exports
[root@dc ~]# exportfs -rav|grep ldaouser1
exporting *:/ldapUserData/ldaouser1
然后看下一节内容,设置automount, 让客户端通过ipa-server 自动映射autofs的配置到客户端,那样客户端就不需要配置autofs了。
额外内容:配置automount
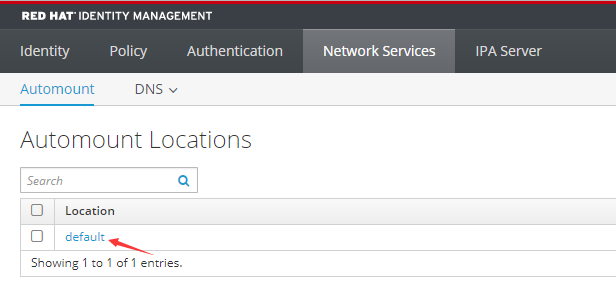
点击 Network Services, 点击Default
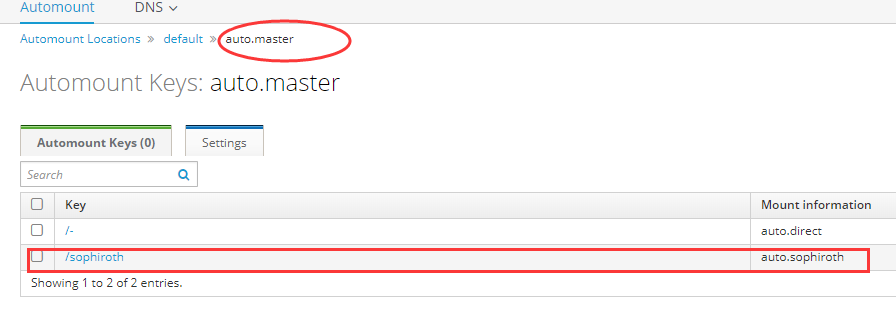
然后点击auto.master,然后添加 /sophiroth 与 auto.sophiroth的对应, 这样配置表示 /sophiroth 目录的内容,是由auto.sophiroth里的配置决定的。
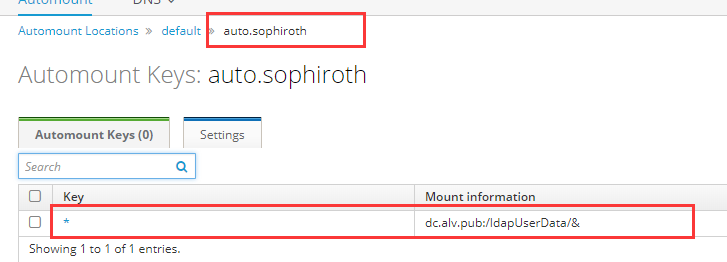
然后我们添加一个Automount Map,名为auto.sophiroth. 该操作就像是创建一个auto.sophiroth文件一样。
然后在auto.sophiroth里添加一个Key和挂载信息,如下 ,表示dc.alv.pub:/ldapUserData/下的所有内容都挂载到左边对应的目录,而左边是哪里呢?就是前面写的/sophiroth目录。
客户端使用ldap
安装ldap客户端软件
yum install nss-pam-ldapd setuptool -y
验证ldap
authconfig --enableldap --enableldapauth --ldapserver=ldap://ipa.alv.pub --disableldaptls --enablemkhomedir --ldapbasedn="dc=alv,dc=pub" --update
如有需要,也可以用图形化shell的方式验证
authconfig-tui
安装启用autofs
yum install autofs -y
systemctl enable autofs
systemctl restart autofs
然后验证用户是否已可用
[root@dhcp ~]# systemctl restart autofs
[root@dhcp ~]#
[root@dhcp ~]# su - ldaouser1
-bash-4.2$
-bash-4.2$ cp /etc/skel/.bash* .
-bash-4.2$ exit
logout
[root@dhcp ~]#
[root@dhcp ~]# su - ldaouser1
Last login: Wed Oct 31 17:51:54 CST 2018 on pts/0
[ldaouser1@dhcp ~]$
[ldaouser1@dhcp ~]$ pwd
/sophiroth/ldaouser1
[ldaouser1@dhcp ~]$ df /sophiroth
Filesystem     1K-blocks  Used Available Use% Mounted on
auto.sophiroth         0     0         0    - /sophiroth
[ldaouser1@dhcp ~]$ df -hP /sophiroth/ldaouser1/
Filesystem                          Size  Used Avail Use% Mounted on
dc.alv.pub:/ldapUserData/ldaouser1  983G  598G  344G  64% /sophiroth/ldaouser1
验证前面设置的密码,确认密码可用
[ldaouser1@dhcp ~]$ su - ldaouser1  #可以通过之前设置的密码登录。
Password:
Last login: Wed Oct 31 17:52:24 CST 2018 on pts/0
[ldaouser1@dhcp ~]$
验证sudo权限
[ldaouser1@dhcp ~]$ id
uid=10086(ldaouser1) gid=10001(sophiroth) groups=10001(sophiroth),10(wheel)
[ldaouser1@dhcp ~]$
[ldaouser1@dhcp ~]$ whoami
ldaouser1
[ldaouser1@dhcp ~]$ sudo whoami
root